Is your garage door wall switch suddenly unresponsive? You’re not alone. A non-working wall control is one of the most common garage door problems homeowners face, and the good news is that many issues can be diagnosed and fixed without calling a technician. In this comprehensive guide, we’ll walk you through the most common causes and provide step-by-step solutions to get your garage door working again.
Start Here: Quick Checks Before You Open Anything Up
Before diving into complex troubleshooting, let’s rule out the simple fixes first. These quick checks take just a few minutes and could save you hours of unnecessary work.
Power Supply Check
First, confirm your garage door opener is plugged in and the outlet is working. It sounds obvious, but loose plugs or tripped circuits are surprisingly common culprits. Test the outlet by plugging in another device, like a mobile phone charger, to verify it’s receiving power.
Circuit Breaker Check
Head to your electrical panel and look for any tripped breakers. A tripped breaker will be in the middle position or flipped to “off.” If you find one, reset it by switching it completely off, then back on. If it trips again immediately, there’s likely a short circuit that requires professional attention.
Test with Remote
Grab your garage door remote and try operating the door. If the remote works but the wall switch doesn’t, you’ve just isolated the problem to the wall control circuit—not the opener motor itself. This simple test is crucial for narrowing down the issue and helps you avoid wasting time checking components that are actually working fine.
Lock/Vacation Mode Check
Look at your wall control panel for a padlock icon or light. Many modern garage door openers include a lock or vacation mode that disables all wall controls and remotes for security when you’re away. If this feature is activated, simply hold the padlock or asterisk (*) button for 5 seconds to deactivate it. The indicator light should stop blinking or turn off completely.
Common Reasons a Garage Door Wall Switch Stops Working
Understanding what typically causes wall switch failures helps you diagnose the problem faster. Let’s explore the most frequent culprits behind a non-responsive wall button.
Disconnected or Broken Control Wire
The control wire connecting your wall switch to the opener is a low-voltage, two-conductor cable (often called bell wire). Over time, vibrations from the garage door operation, rodents chewing through insulation, or simply loose terminal connections can cause this wire to fail.
Symptoms you’ll notice:
- No click sound when pressing the button
- No hum or light flash from the opener
- Complete lack of response
How to test: Use a multimeter to check continuity across the wire. A working wire should show approximately 0 ohms resistance from end to end. If you don’t have a multimeter, you can perform a temporary test by carefully touching a screwdriver across the two push-button (P/B) terminals at the opener. If the door responds, the wall switch or wiring is your problem.
Loose or Corroded Terminal Connections
Even if the wire itself is intact, the connection points can fail. Check both behind the wall plate and at the opener’s terminal strip for issues.
What to look for:
- Green corrosion on brass terminals
- Oxidized or blackened screw contacts
- Loose wire connections that wiggle easily
The fix: Turn off power to the opener at the circuit breaker. Remove the wall plate screws and inspect the wire connections. Re-seat any loose wires, tighten terminal screws, and if you see corrosion, clean the contacts with electrical contact cleaner spray. This simple maintenance can restore connectivity instantly.
Lock (Vacation) Mode Accidentally Enabled
Modern garage door openers often include a vacation lock feature for added security. When enabled, this mode disables both the wall button and all remote controls to prevent unauthorized access while you’re away from home.
Symptoms:
- Wall button completely unresponsive
- Remotes also don’t work
- Padlock LED may be blinking or illuminated
The solution: Locate the lock button (usually marked with a padlock icon or asterisk) on your wall control. Press and hold it for 5 seconds. You should hear a beep or see the LED change to confirm vacation mode has been disabled. This is such a simple fix, yet many homeowners don’t realize their opener has this feature until it’s accidentally activated.
Faulty Wall Switch or Internal Button Failure
Like any electrical component, wall switches eventually wear out. The membrane switch inside the button can degrade from UV exposure (if near a window), repeated use, or simply age.
How to test: At the garage door opener, locate the two terminals labeled P/B (push button). Using an insulated screwdriver, briefly touch both terminals simultaneously. If the door operates, the wall switch itself has failed and needs replacement.
Common causes of switch failure:
- Worn internal membrane from thousands of button presses
- UV damage if the switch is exposed to direct sunlight
- Moisture infiltration causing internal corrosion
- Physical damage from impact
Replacing a wall switch is a straightforward task that most homeowners can handle. New switches typically cost between $15-$40 and require only basic tools to install. For more complex repairs, check out our guide on DIY garage door projects for tips on when to tackle repairs yourself.
Logic Board or Control Circuit Failure
If jumping the push-button terminals at the opener produces no response, the problem likely lies with the opener’s logic board or control circuit. This is a more serious issue that typically requires professional repair.
Warning signs:
- Jumping terminals does nothing
- Diagnostic LED shows error codes (series of blinks)
- Burnt smell coming from the opener unit
- Opener worked fine yesterday, suddenly completely dead
Logic board failures can result from power surges, age, moisture damage, or manufacturing defects. While technically replaceable by experienced DIYers, logic boards are expensive (often $100-$300) and installation requires electrical knowledge. For most homeowners, this is when you should call a professional garage door technician. If you’re considering whether garage door repairs are within your skill level, our article on is garage door repair dangerous provides important safety information.
Step-by-Step Troubleshooting Guide
Now that you understand the common causes, let’s walk through a systematic troubleshooting process. Follow these steps in order for the fastest diagnosis.
Step 1: Test the Remote
Start by testing your garage door remote. If it works, you know the opener motor is functional and the issue is isolated to the wall switch circuit. This immediately rules out motor failure, power issues at the opener, and safety sensor problems affecting overall operation.
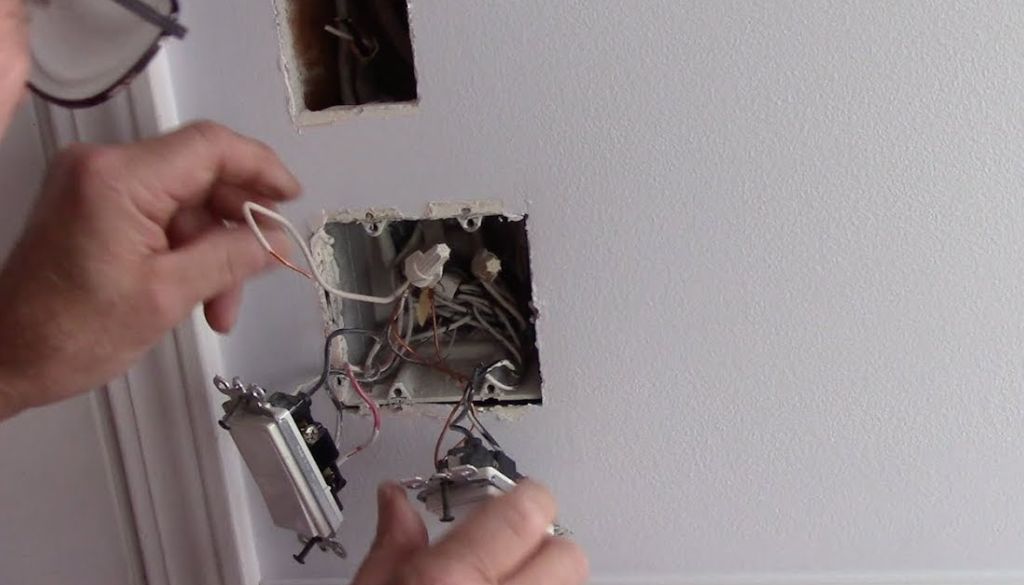
Step 2: Inspect and Tighten Wall Switch Wires
Safety first: Turn off power at the circuit breaker before touching any wiring. Remove the wall plate by unscrewing the mounting screws. Check that both wires are securely connected to the switch terminals. Look for any signs of damage, corrosion, or melted insulation. If the connections look good, the problem might be at the other end.
Step 3: Test Terminals at Opener
Walk to your garage door opener unit. Locate the terminal strip (usually on the back or side of the motor housing) and find the two terminals labeled P/B or PUSH BUTTON. With the power on, carefully use an insulated screwdriver to briefly touch both terminals at the same time.
If the door moves: Your wall switch or the wire running to it has failed.
If nothing happens: The issue is with the opener’s control circuit, logic board, or power supply to the board.
Step 4: Inspect Safety Sensors
Misaligned or dirty photo-eye sensors can prevent your garage door from responding to any command, including the wall switch. Check the sensors mounted about 6 inches above the floor on each side of the door opening.
What to check:
- Both sensors should have solid LED lights (not blinking)
- Lenses should be clean and free of debris
- Sensors should face each other perfectly
- No obstructions in the sensor beam path
Clean the lenses with a soft cloth and realign if necessary. Many garage door openers will show a blinking light on the wall control when sensors are misaligned.
Other Issues That May Seem Like a Wall Switch Problem
Sometimes what appears to be a wall switch malfunction is actually a different problem altogether. Here are some scenarios that can mimic wall switch failure.
Door Starts Then Reverses Immediately
If your garage door begins to close but immediately reverses, this isn’t a wall switch problem—it’s typically caused by:
- Misaligned safety photo-eye sensors
- Obstruction in the door’s path
- Incorrect force settings on the opener
The wall switch is working; the opener is responding to a safety feature designed to prevent the door from closing on objects or people. Understanding how to balance a garage door can help you maintain proper door operation and prevent sensor triggering from an unbalanced door.
Door Won’t Open At All
If the wall switch, remote, and keypad all fail to open a door that was working recently, check for:
- Broken torsion spring (you’ll hear a loud bang when it breaks)
- Snapped lifting cable
- Manual lock engaged on the door itself
- Disconnected opener trolley from emergency release
A broken spring is immediately obvious—the door will feel extremely heavy if you try to lift it manually, and you may see a gap in the torsion spring mounted above the door.
Power Outage or Backup Battery Failure
After a power outage, your opener’s backup battery (if equipped) may have failed or drained. Check for:
- Tripped circuit breaker that hasn’t been reset
- Blown fuse in the opener unit
- Backup battery reading under 12 volts
If your opener has a backup battery and it’s more than 2-3 years old, it may need replacement. Most backup batteries have a lifespan of 1-2 years with regular use.
When to Call a Professional
While many wall switch issues can be resolved with DIY troubleshooting, some situations require professional expertise:
Call Impact Doors in Burpengary East immediately if you encounter:
- Broken torsion springs (extremely dangerous with high tension)
- Frayed or damaged lifting cables
- Logic board damage or persistent electrical issues
- Burning smell from any component
- Repeated circuit breaker trips
- Any situation where you feel unsafe
At Impact Doors, we provide 24/7 emergency service across Moreton Bay and North Brisbane. Our experienced technicians can diagnose and repair wall switch issues quickly and safely. Call (07) 5451 4022 or contact us online for same-day service.
The cost of professional repair varies depending on the issue. A simple wall switch replacement typically runs $80-$150 including labor and parts. Logic board replacement can cost $200-$400 depending on the opener model. For comparison, understanding the cost of a new garage door helps put repair costs in perspective—sometimes repair makes more financial sense than replacement.

Preventing Wall Switch Problems in the Future
Regular maintenance prevents most garage door problems before they become emergencies. Follow this maintenance schedule to keep your system running smoothly:
Yearly tasks:
- Replace remote and keypad batteries annually
- Inspect all visible wiring for damage or wear
- Test vacation/lock mode to ensure it works
- Check all terminal connections for tightness
Every six months:
- Clean safety sensor lenses with a microfiber cloth
- Lubricate rollers, hinges, and springs with garage door lubricant
- Tighten all hardware that’s loosened from vibration
- Test door balance by disconnecting the opener and manually lifting
Additional preventive measures:
- Use a surge-protected power outlet for your opener
- Keep garage temperature-controlled if possible
- Address any door operation issues immediately
- Consider upgrading to a modern opener with advanced diagnostics
Upgrading to a newer garage door opener with smart features can provide diagnostic alerts before complete failure occurs, potentially saving you from being locked out or experiencing sudden failures.
Frequently Asked Questions
Why does my garage door work with the remote but not the wall switch?
This indicates the problem is isolated to the wall switch circuit—either the switch itself, the wiring running from the switch to the opener, or the terminal connections. The opener motor and control board are functioning properly since the remote works. Start by checking for loose wires at both the wall switch and opener terminals.
Can I replace a garage door wall switch myself?
Yes, wall switch replacement is a straightforward DIY project for most homeowners. Wall switches use low-voltage wiring (typically 24 volts), making them safer to work with than standard household electrical. Simply turn off the opener, disconnect the old switch, connect the new switch to the same two wires, and mount it. Most universal replacement switches cost $15-$40.
How do I know if my garage door logic board is bad?
Signs of a failing logic board include: the wall switch and remote both not working, jumping the push-button terminals produces no response, the opener makes no sounds when activated, diagnostic LEDs show error codes, or there’s a burning smell. If the logic board has failed, the entire opener will be unresponsive regardless of how you try to activate it.
Why is my wall control panel blinking?
A blinking wall control usually indicates one of three issues: vacation/lock mode is enabled, the safety sensors are misaligned or blocked, or there’s a communication problem between the control and the opener. Check your owner’s manual for the specific blink pattern—different manufacturers use different codes to diagnose problems.
How much does it cost to replace a garage door wall switch?
A basic replacement wall switch costs $15-$40 for the part. Professional installation adds $60-$100 in labor, bringing the total to $75-$140. However, if you’re comfortable with basic DIY tasks, this is an easy project that takes about 15 minutes. More advanced smart wall controls with features like timer-to-close and battery backup cost $80-$150 for the part alone.
Take Action Today
A non-working garage door wall switch is more than an inconvenience—it affects your daily routine and home security. Most issues can be resolved quickly with proper diagnosis, and this guide has given you the knowledge to troubleshoot effectively.
If you’ve followed these steps and still need help:
- Call Impact Doors at (07) 5451 4022 for 24/7 emergency service
- Visit our office at 427 Uhlmann Road, Burpengary East QLD 4505
- Request a free quote online at impactdoors.net.au
We serve all of Moreton Bay and North Brisbane with prompt, professional garage door repair services. Our technicians carry common parts on their service vehicles, meaning we can often complete repairs on the same visit. With over 150 five-star reviews from satisfied customers across the region, you can trust Impact Doors to get your garage door working right.
Don’t let a faulty wall switch disrupt your life. Whether you need a simple button replacement or complex electrical troubleshooting, our experienced team has you covered. Understanding when to call professionals versus attempting repairs yourself is important—learn more about panel replacement and other common repairs to make informed decisions.
Contact Impact Doors today and experience the difference that professional, reliable garage door service makes. We’re here to help get your garage door working smoothly again, with the safety and peace of mind you deserve.