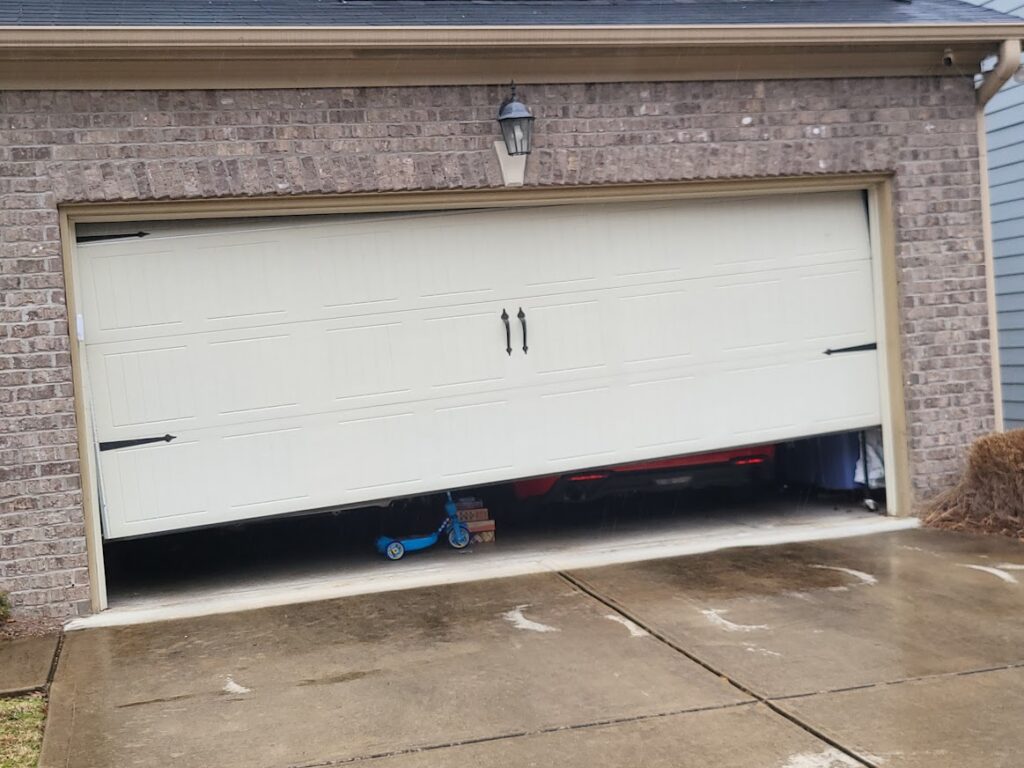
A garage door that leans, drags, or won’t close evenly isn’t just annoying—it’s a safety risk and a sign that something needs immediate attention. A misaligned door can strain your opener motor, accelerate wear on rollers and tracks, damage the door frame over time, and even compromise your home’s security. Using a garage door leveler (or performing a thorough leveling check) ensures your door operates safely, smoothly, and extends its service life significantly.
When homeowners notice gaps along the bottom of their closed door, uneven spacing on the sides, or hear grinding and scraping sounds during operation, these are clear indicators that leveling is needed. Understanding how to identify, diagnose, and correct these issues—whether through DIY adjustments or professional service—can save you hundreds in repairs and prevent dangerous malfunctions.
This comprehensive guide covers everything you need to know about garage door leveling: what tools you’ll need, how to identify the root causes of misalignment, step-by-step adjustment procedures for both sectional and roller doors, and when it’s time to call in professional expertise.
Key Takeaways
A properly leveled garage door is fundamental to safe, quiet, and reliable operation. Understanding the causes of misalignment—from worn components to structural settling—helps you address problems at their source rather than just treating symptoms.
Many leveling adjustments are achievable DIY projects for homeowners comfortable working with tools, provided you take proper safety precautions and work methodically. Always secure the door before making adjustments, check your work carefully, and don’t hesitate to call professionals when the situation warrants expert intervention.
Regular inspections and preventative maintenance catch small alignment issues before they cause major damage to your door, opener, or garage structure. A few minutes of attention every few months can save hundreds or thousands in repair costs down the line.
Remember: a level garage door isn’t just about aesthetics or convenience—it’s about safety, security, and protecting your investment in your home. Keep your door properly aligned, and it will serve you reliably for decades to come.
What Is a Garage Door Leveler?
A garage door leveler refers to both a tool and a process used to ensure your garage door is properly aligned. Specifically, it helps you:
- Check horizontal alignment: Verify the door sits evenly across the floor when closed, with no gaps on one side
- Verify vertical alignment: Ensure the door panels and tracks are perfectly plumb (straight up and down)
- Confirm smooth operation: Make certain the door travels evenly along both tracks without binding or rubbing
Even a slight tilt—as little as half an inch—can cause significant problems. The door may rub against the track on one side, creating excessive friction that forces your opener motor to work harder. Over time, this uneven stress leads to premature wear on rollers, springs, cables, and the opener itself. Proper garage door balance and leveling work hand-in-hand to maintain safe operation.
Common Causes of an Uneven Garage Door
Understanding why garage doors become misaligned helps you address the root problem, not just the symptoms. Here are the primary culprits:
Misaligned Tracks
When vertical tracks aren’t perfectly plumb or horizontal tracks develop sag, the door cannot travel straight. Even minor deviations compound over the door’s full travel distance, creating significant misalignment by the time the door reaches the floor. Regular track maintenance prevents many of these issues.
Worn or Frayed Cables
Garage door cables support tremendous weight and undergo constant tension cycles. Over time, cables can stretch unevenly, fray, or develop weak spots. When one cable stretches more than its counterpart, the door tilts toward the side with less cable tension, creating an obvious lean.
Uneven Spring Tension
Springs provide the lifting force that counterbalances your door’s weight. Whether you have torsion springs (mounted above the door) or extension springs (along the tracks), uneven tension between left and right springs causes the door to lift unevenly. One side rises faster than the other, creating a diagonal tilt during operation.
Foundation Settling
Australian homes, particularly in Queensland’s clay soils, experience foundation movement over time. As your home’s foundation settles unevenly, it can distort the garage door frame. What was once a perfectly square opening may shift, causing the door to no longer align properly within its frame.
Loose Hardware
Brackets, bolts, hinges, and track mounting hardware experience vibration with every door cycle. Over thousands of operations, fasteners gradually loosen, allowing components to shift out of position. A loose track bracket, for instance, can allow the track to drift away from the wall, creating misalignment.
How to Identify If Your Garage Door Is Uneven
Before attempting any adjustments, you need to confirm that leveling is actually the issue. Here’s how to perform a comprehensive assessment:
Visual Inspection
Stand approximately three meters back from your closed door and look carefully at:
- The bottom seal against the floor—are there gaps on one side?
- The spacing between door edges and the door frame—is it consistent?
- The door panels themselves—do they appear parallel to each other and the ground?
Manual Balance Test
This simple test reveals spring tension issues:
- Disconnect the opener by pulling the emergency release cord
- Manually lift the door until it’s approximately hip height (1-1.2 meters off the ground)
- Carefully release your grip and step back
- Observe what happens:
- Stays in place: Springs are properly balanced
- Drops down: Springs are under-tensioned
- Rises up: Springs are over-tensioned
A door that won’t hold position at the halfway point needs spring adjustment before leveling can be properly addressed.
Movement Observation
Watch the door carefully through several complete open and close cycles:
- Does it move smoothly on both sides simultaneously?
- Do you notice any jerking or stuttering movement?
- Does one side reach the top or bottom before the other?
Sound Check
Your ears can detect problems your eyes might miss:
- Grinding or scraping sounds indicate the door rubbing against tracks
- Squealing from one side suggests uneven roller wear or track misalignment
- Banging or clunking points to loose hardware or worn rollers jumping in tracks
Roller Position Check
Examine the rollers on both sides of the door. They should sit centered in their tracks without tilting. If rollers appear cocked at an angle or the wheels are touching one side of the track more than the other, leveling is needed.
Tools Needed for DIY Leveling
Before starting any adjustment work, gather these essential tools:
- Spirit levels: Both a long level (1.2-1.5m) for checking tracks and a shorter level for detailed work
- Adjustable wrenches and socket set: For loosening and tightening track brackets and hardware
- Screwdrivers: Both Phillips and flathead varieties for various fasteners
- Pliers: Standard and locking pliers for securing components during adjustment
- Rubber mallet: For gently tapping tracks into alignment without causing damage
- C-clamps or locking pliers: Essential for securing the door in place while you work
- Safety equipment: Heavy-duty work gloves and safety glasses are non-negotiable
- Lubricant: High-quality silicone spray or white lithium grease for maintaining smooth operation
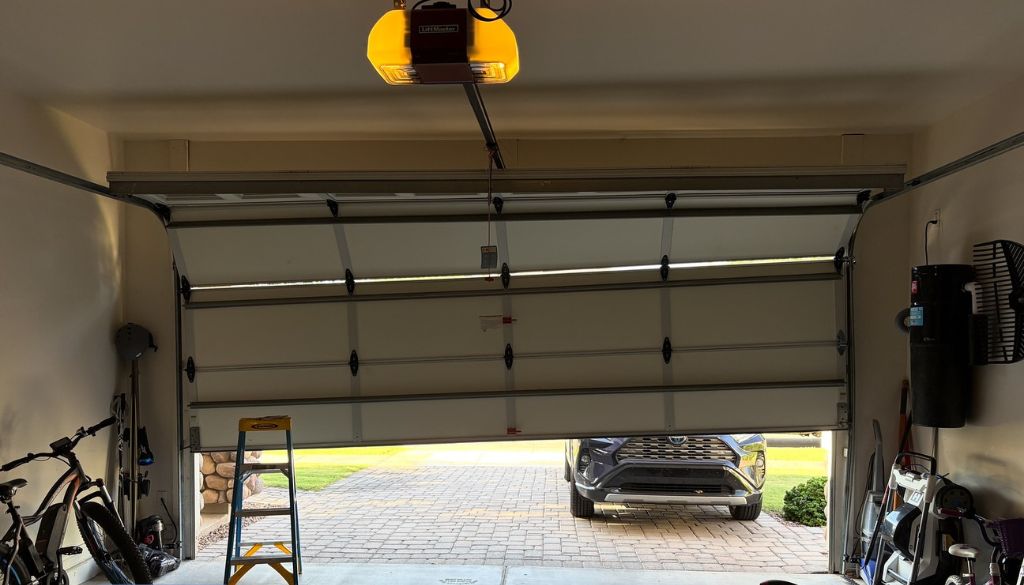
Step-by-Step Guide to Level Your Garage Door
Follow this systematic approach to level your garage door safely and effectively:
1. Secure the Work Area
Before touching any hardware:
- Lower the door completely and disconnect the automatic opener
- Use C-clamps to secure the door to the tracks at the bottom roller position
- This prevents the door from suddenly moving while you’re working on it
- Ensure adequate lighting so you can see all hardware clearly
2. Check and Adjust Vertical Track Alignment
The vertical tracks must be perfectly plumb for the door to operate correctly:
- Start with one side—loosen (but don’t remove) the mounting brackets holding the vertical track to the wall
- Use your long spirit level against the track to check for vertical alignment
- Gently tap the track with a rubber mallet to adjust its position
- Once perfectly vertical, verify the gap between the door edge and track is consistent (typically 6-12mm)
- Retighten all mounting bolts firmly
- Repeat the entire process on the opposite side, ensuring both tracks are identically positioned
3. Align Horizontal Track Sections
For sectional garage doors with horizontal track runs:
- Check that horizontal tracks are level from front to back using your spirit level
- Look for sagging in the middle sections—this is common in older installations
- Adjust the back-hang brackets (the supports holding the horizontal track near the ceiling)
- Ensure both horizontal tracks run perfectly parallel to each other
- The gap between tracks should be consistent along their entire length
4. Center the Door Curtain (Roller Doors Only)
If you have a roller door rather than a sectional door:
- Slightly loosen the side guide mounting screws on both sides
- Manually shift the door curtain left or right until it sits centered between the guides
- Check that the curtain feeds evenly into the roller box above
- Tighten all guide fixings and test the door movement by hand before reconnecting power
5. Reconnect and Adjust Opener Settings
Once the door moves smoothly through manual operation:
- Reconnect the automatic opener
- Adjust the up and down limit settings so the door opens fully and closes completely
- Fine-tune the force/sensitivity settings—the door should close with enough pressure to seal properly but not so much that it won’t reverse when it encounters an obstacle
- Run several complete cycles to confirm smooth operation
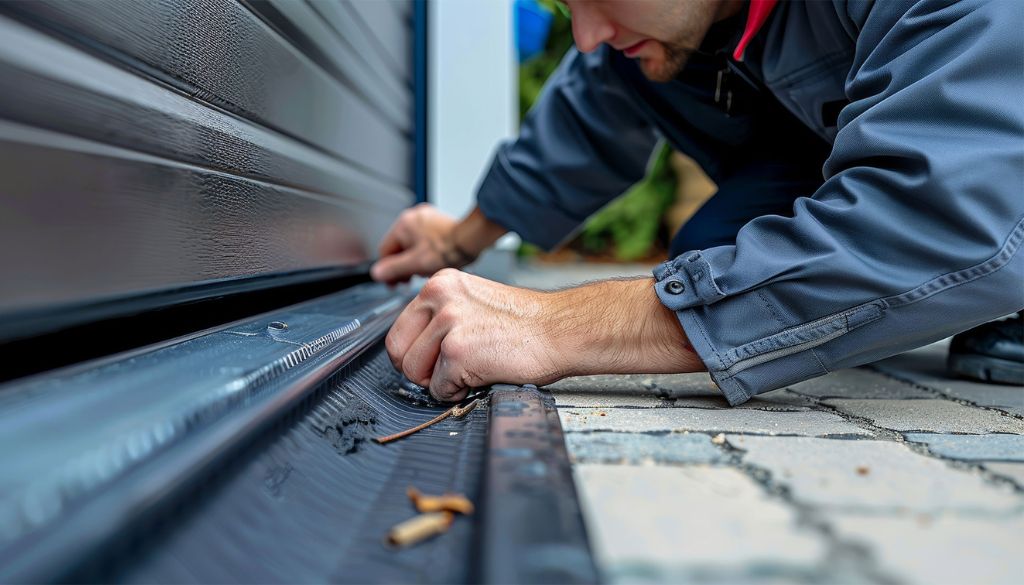
6. Lubricate and Final Hardware Check
Complete the leveling process with proper maintenance:
- Apply silicone spray or white lithium grease to all rollers, hinges, and spring coils
- Check every bolt, bracket, and hinge—tighten any that have loosened during adjustment
- Replace any worn rollers or damaged seals you discovered during the leveling process
- Test the door’s noise level—properly leveled and lubricated doors operate much more quietly
Regular Garage Door Leveling & Maintenance Schedule
Preventative maintenance keeps small issues from becoming major problems:
Every 3-6 Months:
- Visual inspection of tracks, rollers, cables, and springs
- Quick check of door level when closed—look for gaps
- Listen for any new or unusual sounds during operation
Annually:
- Thorough cleaning and lubrication of all moving components
- Detailed balance test at the halfway point
- Inspection of cable condition and spring tension
- Hardware tightness verification
After Major Weather Events:
- Check for any shifting caused by heavy storms or temperature extremes
- Queensland’s summer heat and winter cold can affect metal components
- Verify the door still seals properly after seasonal changes
Regular attention to these tasks dramatically reduces the likelihood of major repairs and extends your garage door’s service life from 15-20 years to potentially 25-30 years.
Frequently Asked Questions About Garage Door Leveling
How do I know if my garage door is unlevel?
The easiest way to check is to close your door completely and look for gaps between the bottom seal and the floor. If you see daylight on one side but not the other, your door is unlevel. You can also watch the door as it opens—if one side rises faster than the other or the door appears to move diagonally, it’s misaligned. Another telltale sign is grinding or scraping noises coming from one side during operation, indicating the door is rubbing against the track.
Can I level my garage door myself, or do I need a professional?
Many leveling adjustments are safe DIY projects if you have basic tool skills and follow proper safety procedures. Track alignment adjustments, hardware tightening, and minor tweaks are generally manageable. However, any work involving springs or cables requires professional expertise due to the extreme tension these components carry. If your door drops suddenly, feels extremely heavy, or you notice broken springs or frayed cables, always call a professional. When in doubt, it’s safer and often more cost-effective to get expert help than risk injury or damage.
How much does it cost to have a garage door professionally leveled?
Professional garage door leveling typically costs between $150-$300 for straightforward track alignment and adjustment work. The price can increase if the service reveals underlying issues like worn cables ($100-$200 additional), spring replacement ($200-$400), or bent tracks requiring replacement ($300-$500). At Impact Doors, we provide free assessments so you know exactly what’s needed before any work begins. Keep in mind that addressing leveling issues promptly often prevents more expensive repairs down the track.
How often should I check my garage door level?
Include a quick visual check for level every 3-6 months as part of your routine garage door maintenance. Look for gaps when the door is closed and listen for any changes in operation sounds. Perform a more thorough inspection annually, including the manual balance test at the halfway point. Additionally, check the level after any significant weather event, foundation work on your home, or if you notice any changes in how the door operates. Queensland homes built on reactive clay soils may need more frequent checks due to seasonal ground movement.
Will leveling my garage door fix all operation problems?
Leveling addresses many common issues including uneven gaps, door binding, excessive noise from rubbing, and premature wear on one side of the system. However, it won’t fix problems unrelated to alignment such as a failing opener motor, broken springs (though it may reveal them), worn rollers throughout the system, or damaged door panels. Think of leveling as foundational—your door must be level to operate properly, but other maintenance and repairs may still be necessary. If leveling doesn’t resolve your issues, there’s likely another underlying problem that requires diagnosis.
When to Call a Professional
While many leveling adjustments are within the capabilities of a confident DIYer, certain situations absolutely require professional expertise:
Springs or Cables Are Damaged
Broken or severely frayed springs and cables store dangerous amounts of tension. Attempting repairs without proper training and specialized tools can result in serious injury. If you notice any cable fraying or hear a loud bang (indicating spring failure), call immediately.
Door Drops Suddenly or Feels Extremely Heavy
A door that falls rapidly when released or requires excessive force to lift manually indicates a major spring failure. This is dangerous and requires immediate professional attention.
Tracks Are Bent or Severely Warped
While minor track adjustments are manageable, tracks that are bent, twisted, or severely damaged need replacement. Improperly repaired tracks will continue causing problems and may fail catastrophically.
Opener Motor Struggles Excessively
If your opener makes grinding sounds, overheats, or struggles even after you’ve performed leveling adjustments, the motor may be failing or the door may have structural issues requiring expert diagnosis.
DIY Adjustments Don’t Resolve the Problem
If you’ve followed proper procedures and the door still operates unevenly, there may be underlying structural issues with the door itself or the garage frame that require professional assessment.
At Impact Doors, our experienced technicians handle garage door leveling, track alignment, and complete system repairs throughout Moreton Bay and North Brisbane. Owner Jarred Turner and his team work with all major brands including B&D, Best Doors, Stoddart, Centurion, Steel-Line, and Dynamic. Whether your door needs minor adjustment or complete track replacement, we provide prompt, professional service.
Call (07) 5451 4022 for a free assessment or same-day emergency service. Located at 427 Uhlmann Road, Burpengary East QLD 4505, we’re available 24/7 for emergency calls when you can’t secure your garage.